
3、Foxmail设置邮箱签名
📌 重点提示:先复制下方签名模板,在 Foxmail 设置 → 写邮件 → 高级 → 签名管理 中新建并粘贴,记得修改个人信息。
签名模板(请复制使用)

顺祝商祺!
张 三 (XXX部)
手 机:12345678899
电 话:0769-82708852
邮 箱:zhangsan@cloupor.com
地 址:广东省东莞市虎门镇赤岗富马路13号
网 站:www.cloupor.com
*******************************************************
本邮件仅供指定个人或公司使用,其所载内容可能含有克莱鹏科技商业信息、保密信息或其它不得披露信息。未经发件人许可任何人不得以任何形式不当使用本邮件中的部分或全部信息。如果您误收了本邮件,请您立即电话或邮件通知发件人并删除本邮件。
Disclaimer: This email is only for use by designated individuals or companies, and it may contain business information, confidential information or other nondisclosure information about Cloupor Technology. No one may improperly use part or all of the information in this email in any form without the permission of the sender. If you have received this email by mistake, please notify the sender by phone or email immediately and delete this email.
*******************************************************
设置步骤
- 复制上方签名模板
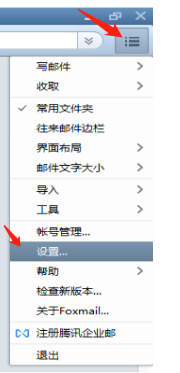
- 打开 Foxmail,点击主窗口右上角菜单 → 设置...

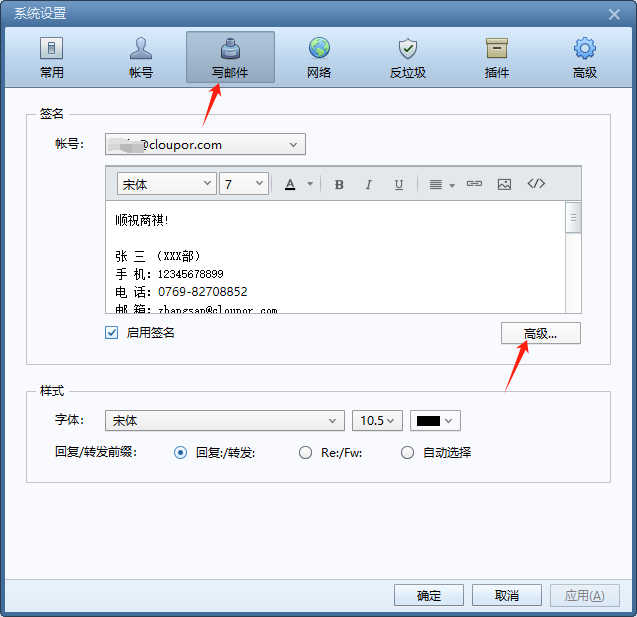
- 点击「写邮件」→「高级...」
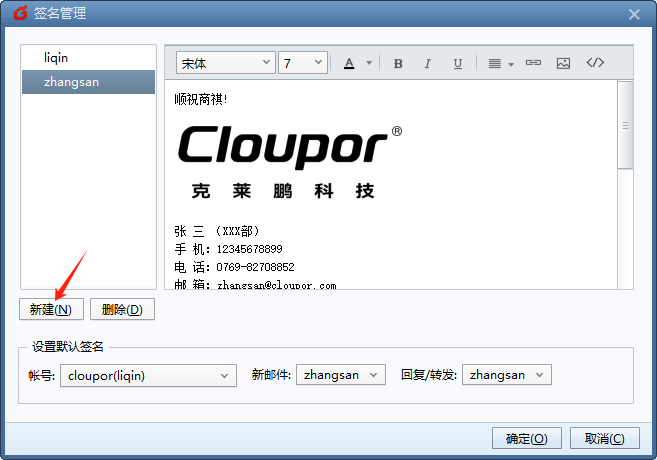
- 在签名管理窗口点击新建(N)
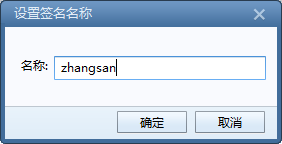
- 设置签名名称并确定
- 将模板粘贴到右侧文本框,修改姓名、部门、手机、电话、邮箱、地址等信息
- 在「新邮件」「回复/转发」下拉框中选择刚创建的签名,点击确定
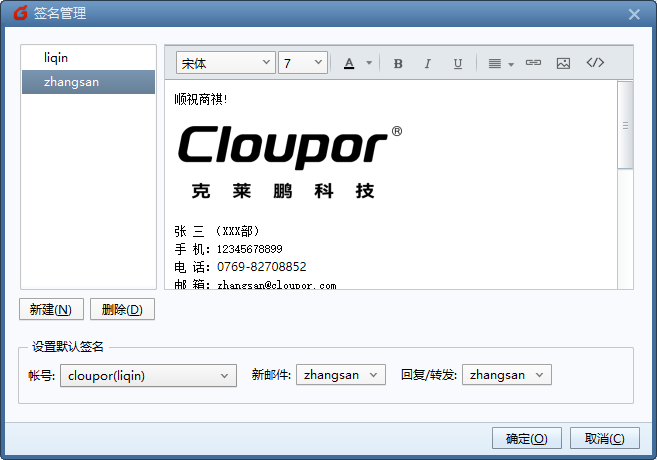
提示:可根据需要设置多个签名,写邮件前切换选择即可。
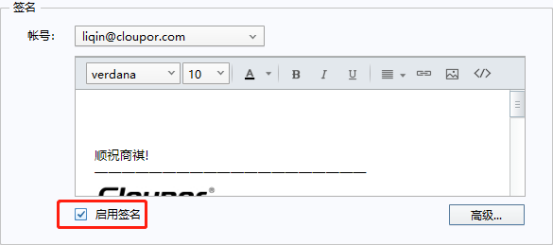
- 确认已勾选启用签名
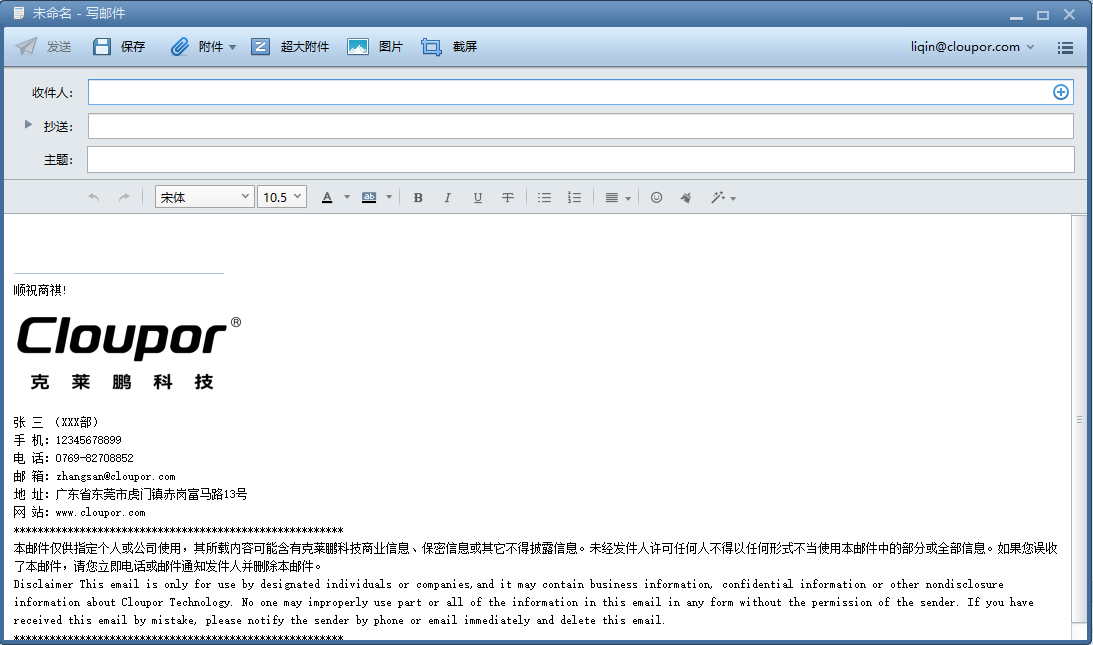
设置完成后,写邮件时正文下方将自动显示签名:
- 如有多个邮箱账号,需在各账号内重复以上操作
No comments to display
No comments to display